Inventory
See how many of each product you have at each location, change the numbers, and read their history.
Inventory is your stock: how many of each product (or variant) you have at each location. A location is a place where you keep stock, such as your shop or a warehouse.
Open Inventory
In the sidebar, press Products, then Inventory. (The Inventory button on the products list opens it too.)
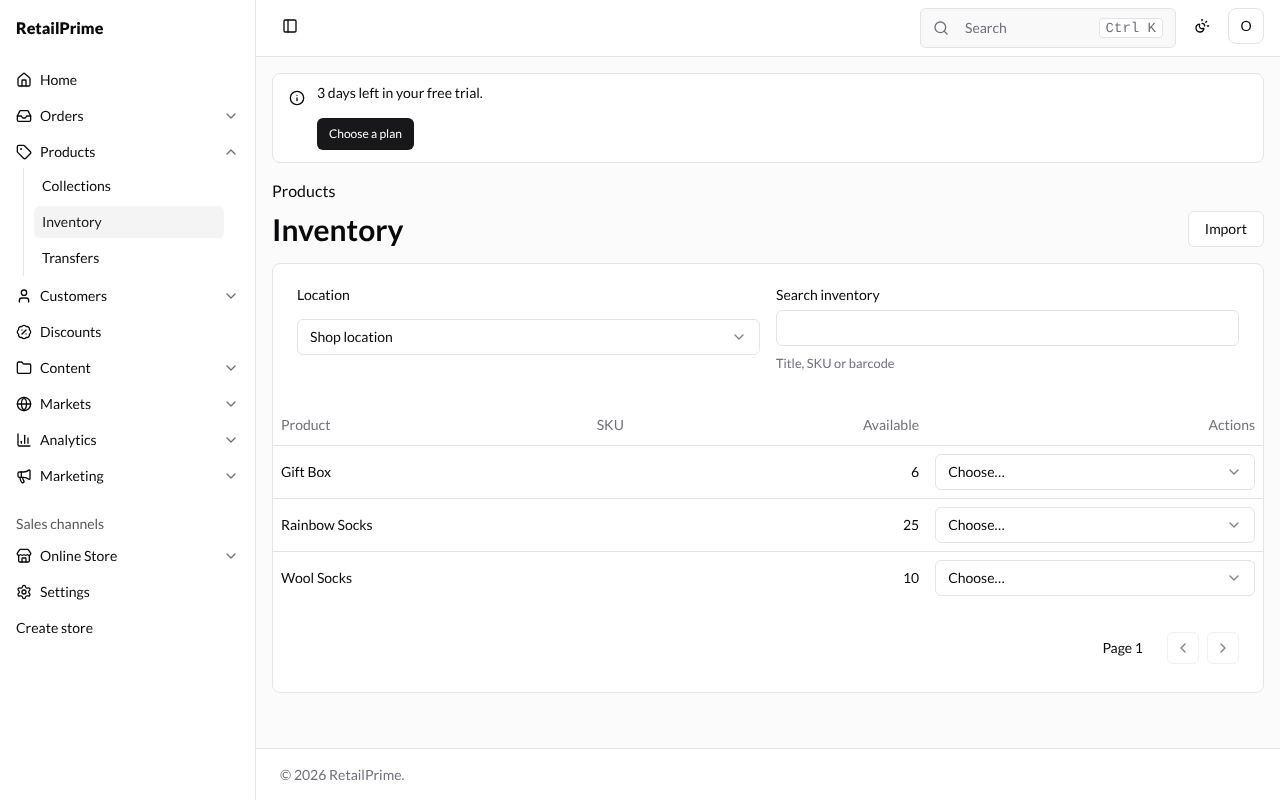
| Part | What it does |
|---|---|
| Location | Which location the list is for. It starts at your default location, here Shop location |
| Search inventory | Find a product by title, SKU or barcode. Type and press Enter |
| Product, SKU, Available | Each product (or variant) and how many are available there |
| Actions | A list of things you can do to that row (below) |
The list shows what is stocked at that location, 50 a page. A product whose Track quantity box is empty has no count, so it isn’t listed (see Add a product).
The actions on a row
Press the Choose… box at the end of a row:
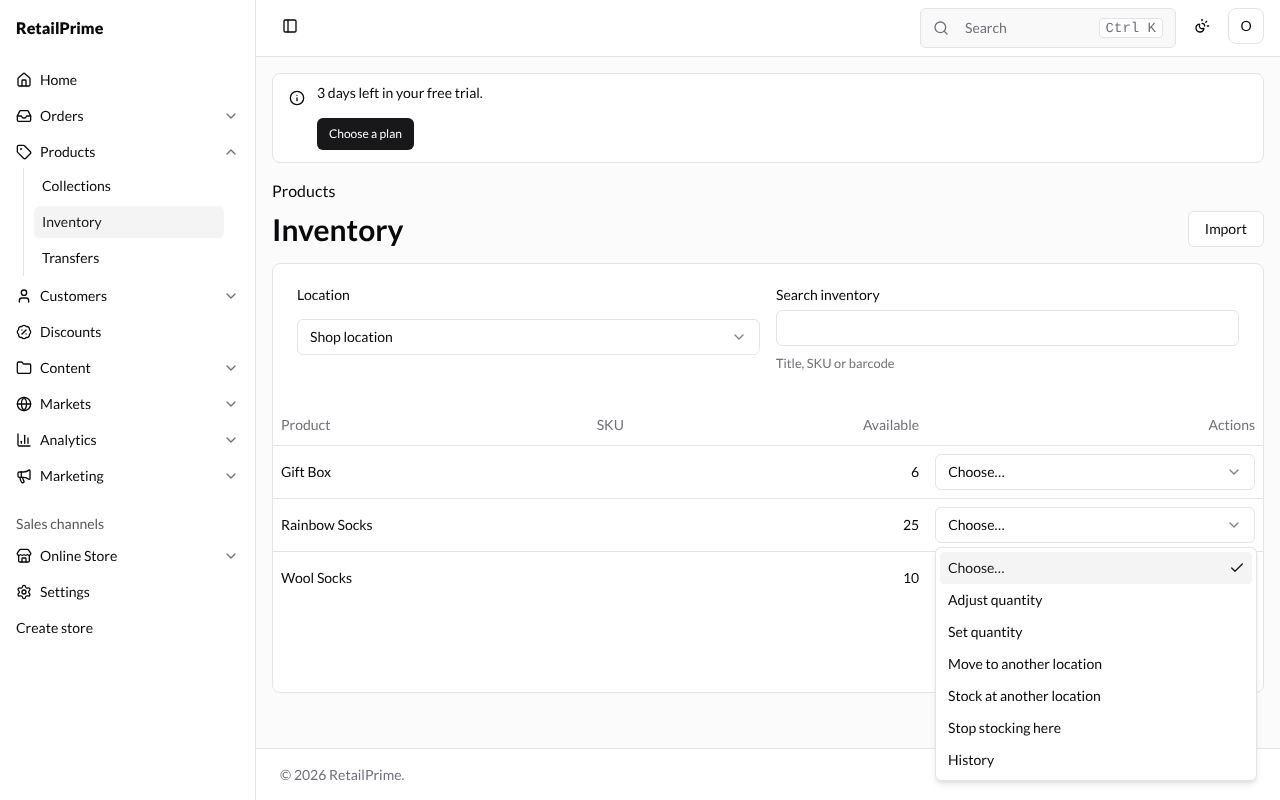
| Action | Use it when |
|---|---|
| Adjust quantity | Stock came in or went out: add or take away a number, with a reason |
| Set quantity | You counted and want to type the real number |
| Move to another location | You moved units to another location yourself, straight away (for stock that travels, use Transfers) |
| Stock at another location | You want to start keeping this product at another location too. It starts there at 0 |
| Stop stocking here | You no longer keep it here. Only a quantity of 0 can stop being stocked; its history is kept |
| History | You want to see every change to this number |
Adjust a quantity
Say 10 more pairs of Rainbow Socks arrived.
- On the Rainbow Socks row, press Choose… and pick Adjust quantity.
- A box opens: Adjust quantity. It says how many are available now (Rainbow Socks at Shop location: 25 available.).
- Press Reason and choose why the number changes:
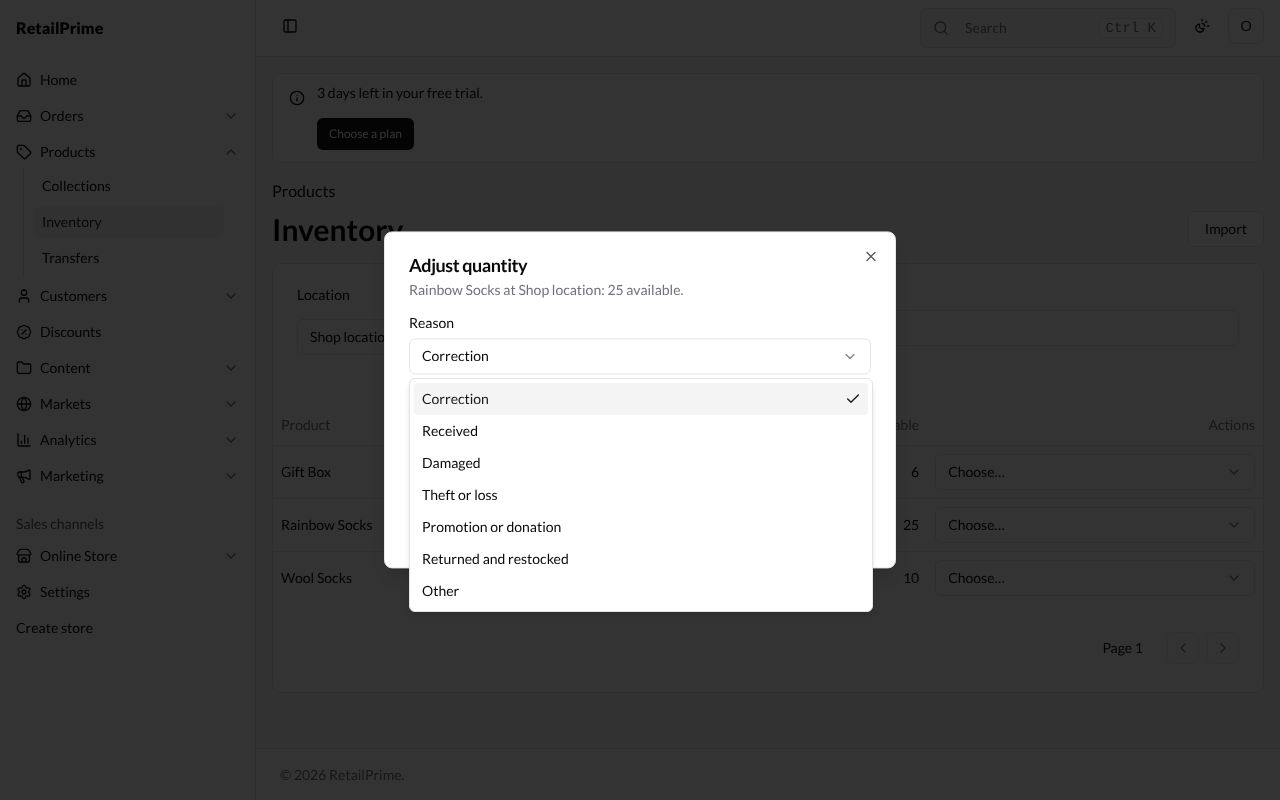
| Reason | When |
|---|---|
| Correction | Fixing a wrong number |
| Received | New stock arrived |
| Damaged | Units are broken or spoiled |
| Theft or loss | Units went missing |
| Promotion or donation | You gave units away |
| Returned and restocked | A buyer sent units back and you put them on the shelf |
| Other | Anything else |
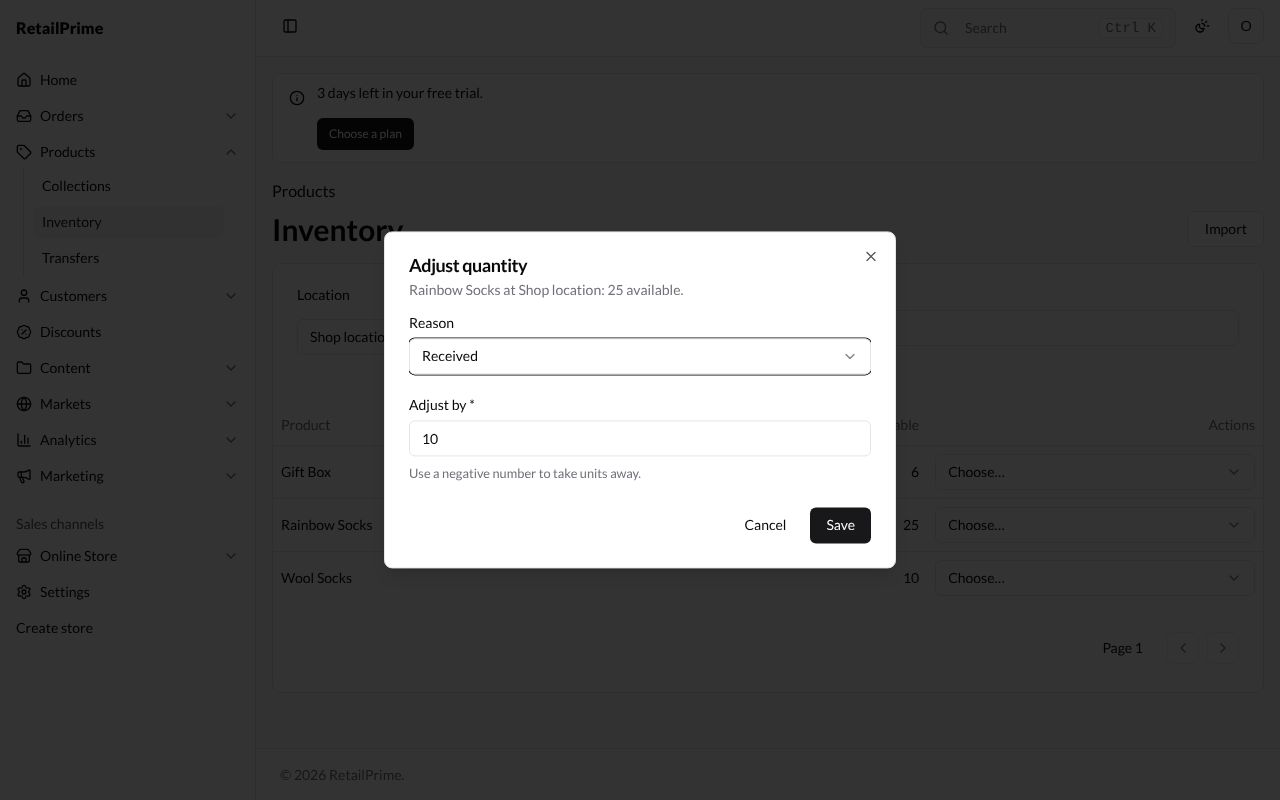
- In Adjust by, type how many to add, here
10. To take units away, type a minus first, such as-2. - Press Save. The row now shows 35.
Set a quantity
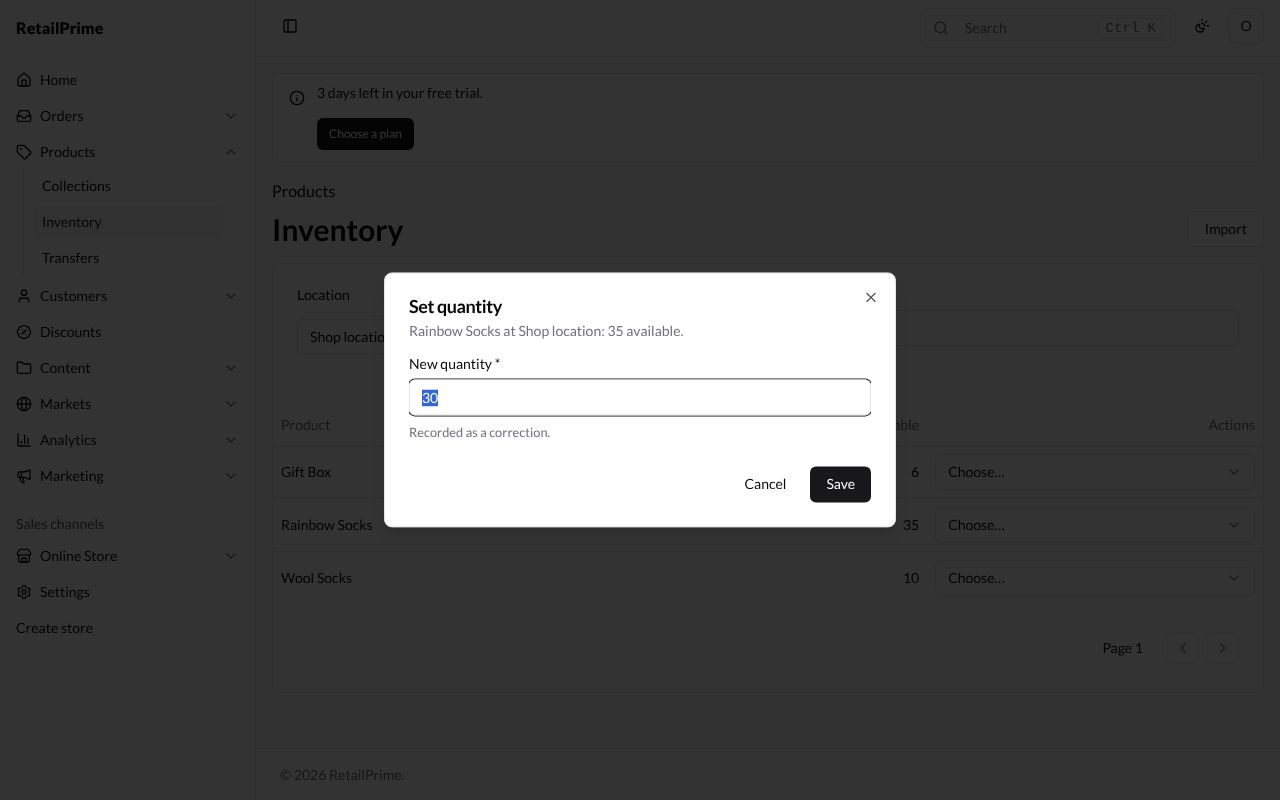
You counted the shelf and found 30.
- On the row, press Choose… and pick Set quantity.
- In New quantity, type the real number, here
30. It is recorded as a correction. - Press Save.
See the history
- On the row, press Choose… and pick History.
- A box lists every change at this location, newest first: the Date, the Reason, who made it (By), the Change (such as +10) and how many were Available after it.
- Press Close.
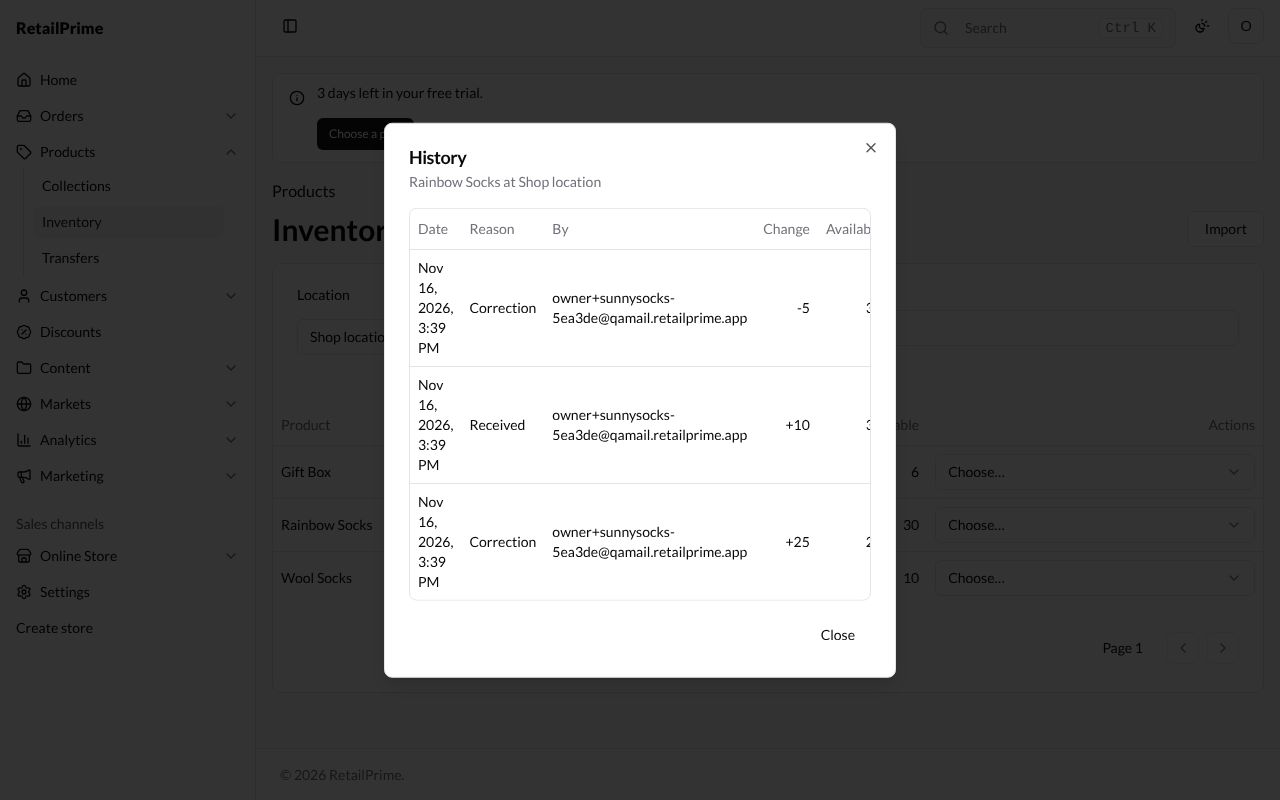
The first line, +25, is the starting quantity you typed when you added the product.
Add a second location
To keep stock in more than one place, add a location first.
- In the sidebar, press Settings, then Locations.
- Press Add location.
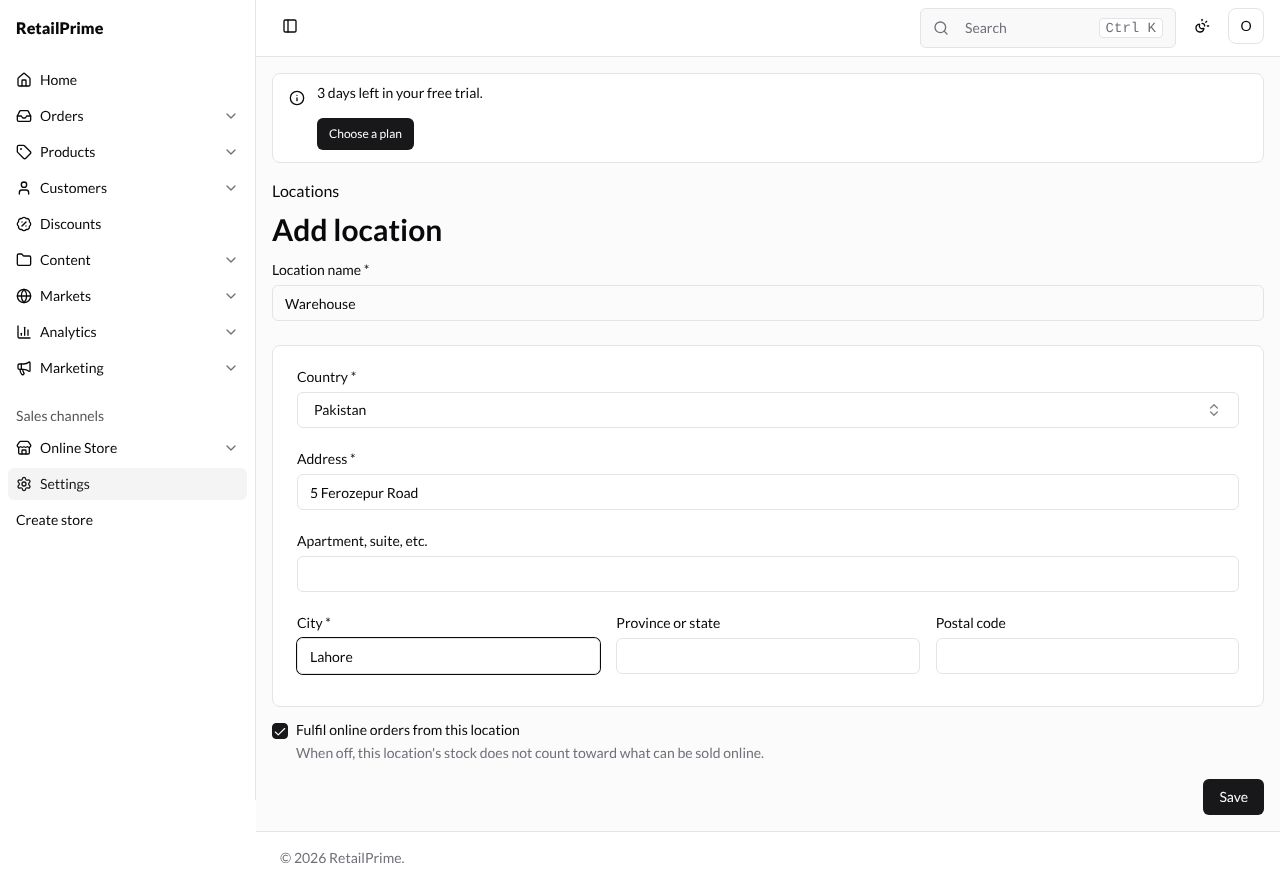
- Fill in the boxes with a star (*): Location name (here
Warehouse), Country, Address and City. Apartment, suite, etc., Province or state and Postal code are optional. - Fulfil online orders from this location is ticked at first. When it is off, this location’s stock does not count toward what can be sold online.
- Press Save.
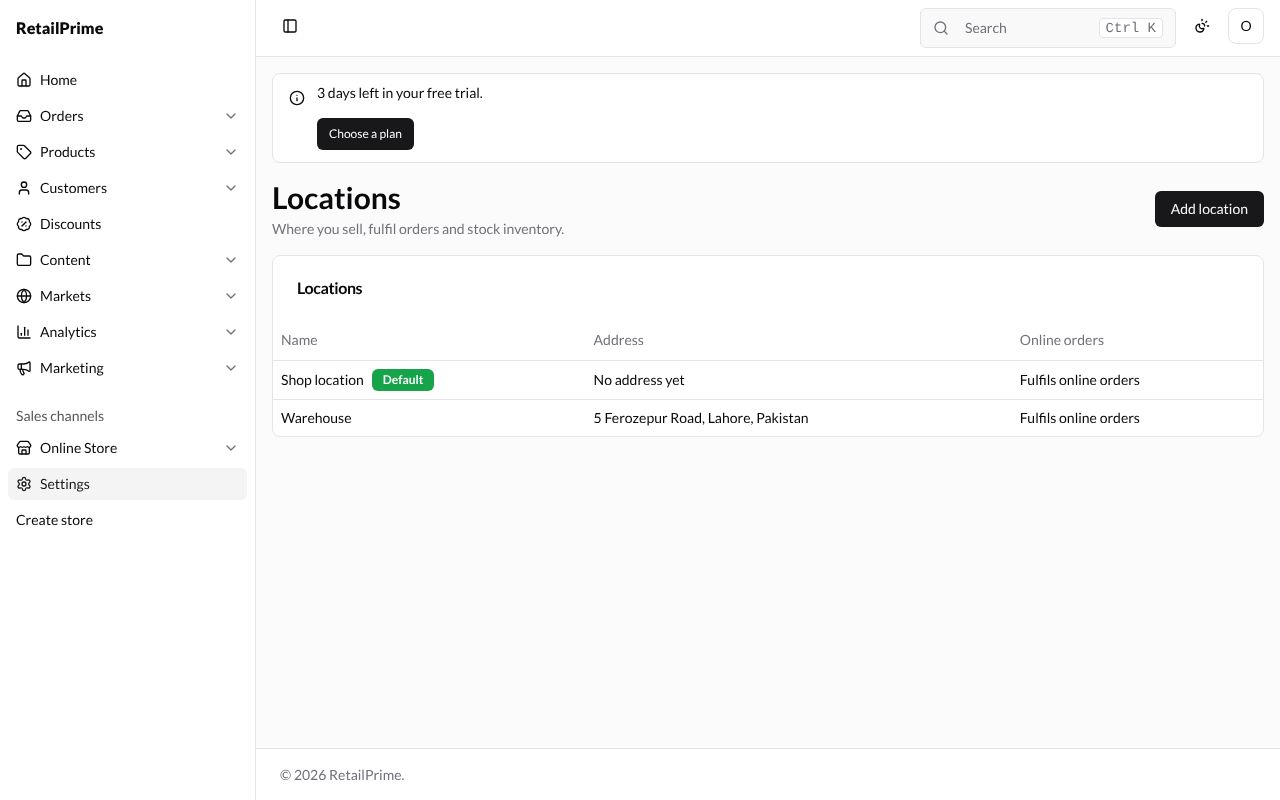
The Locations page now lists both. Your first location is marked Default.
New products now have a box for each location under Quantities, and are stocked at every location. A product you added before the new location (here the Gift Box) is not stocked there until you say so (see Stock at another location).
Move units to another location
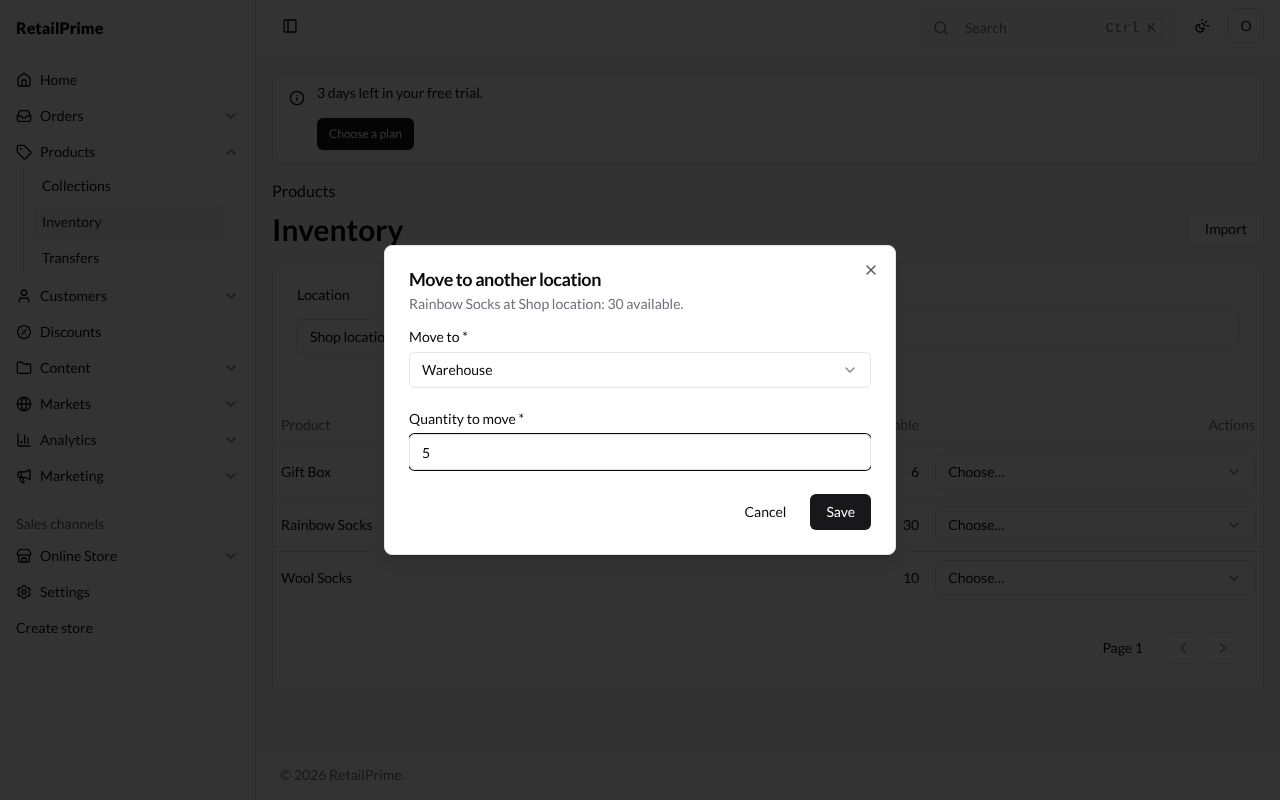
You carried 5 pairs of Rainbow Socks from the shop to the warehouse yourself.
- On Inventory at Shop location, on the Rainbow Socks row, press Choose… and pick Move to another location.
- A box opens: Move to another location, with how many are available (Rainbow Socks at Shop location: 30 available.).
- Press Move to and choose where they went, here Warehouse.
- In Quantity to move, type how many, here
5. - Press Save. The Shop location row now shows 25, and the Warehouse has 5 more.
Stock at another location
The Gift Box was added before the Warehouse existed, so the Warehouse doesn’t keep it yet.
- On the Gift Box row, press Choose… and pick Stock at another location.
- Press Location and choose Warehouse. The box says The variant is stocked there at 0.
- Press Save.
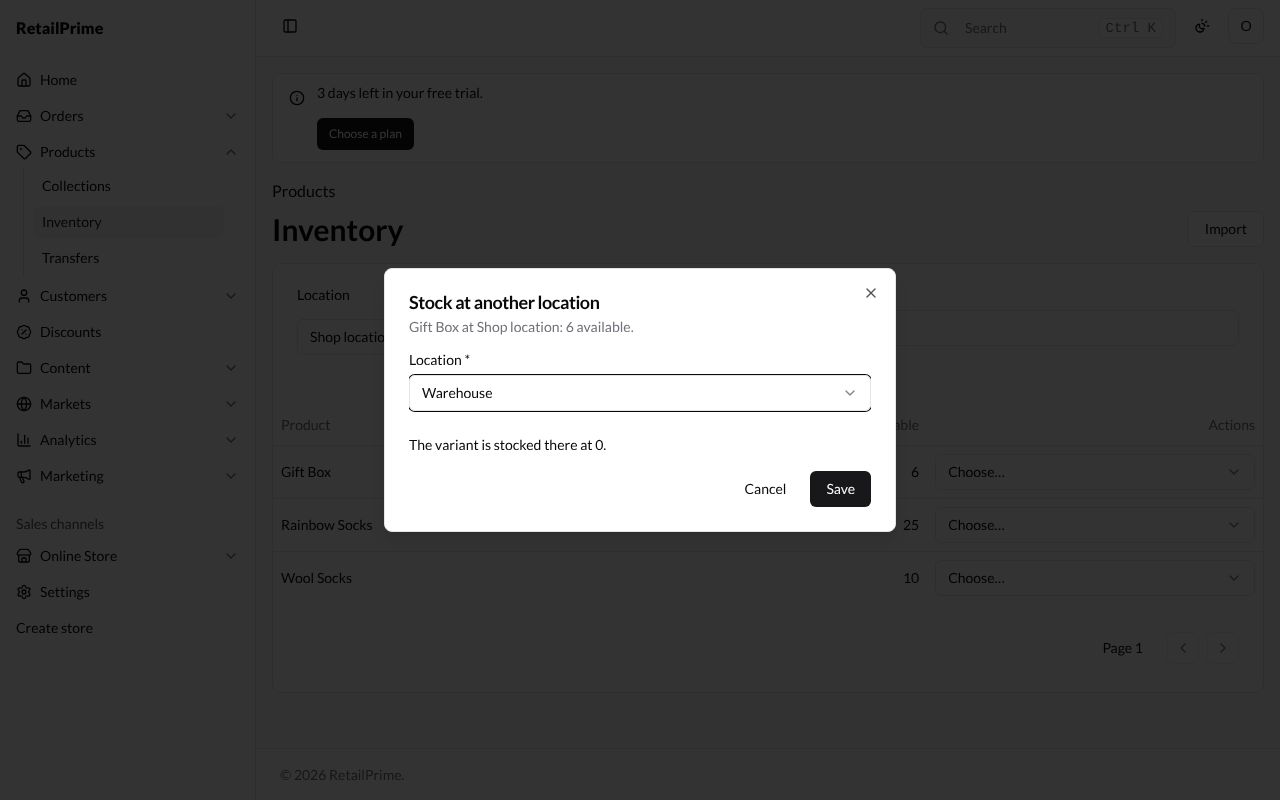
If the product is already kept everywhere, Location says Stocked at every location.
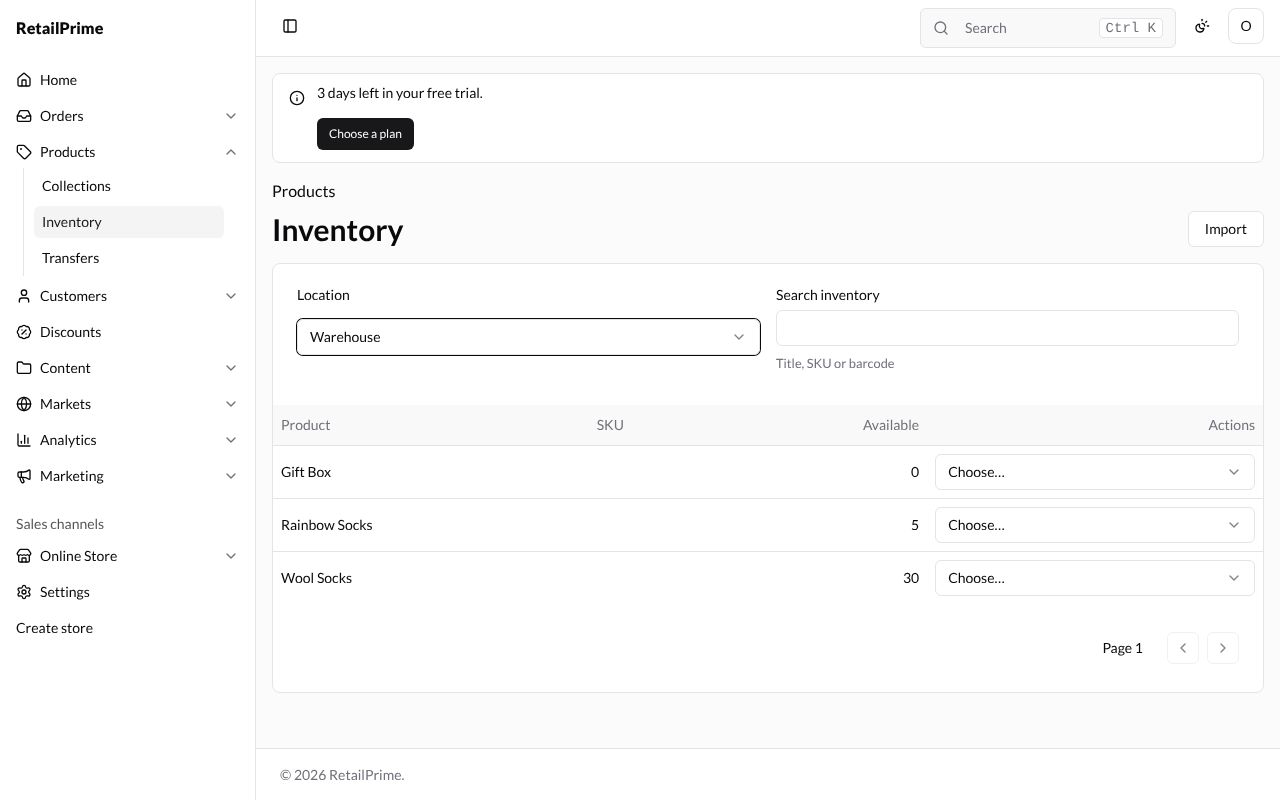
See another location
On Inventory, press Location and choose the other one, here Warehouse. The list shows what is there: the 5 Rainbow Socks you moved, the Wool Socks, and the Gift Box at 0.
Stop stocking here
The warehouse won’t keep Gift Boxes after all.
- With Location on Warehouse, on the Gift Box row, press Choose… and pick Stop stocking here.
- The box says Only a quantity of 0 can stop being stocked. Its history is kept. If there are units left, move them or set the quantity to 0 first.
- Press Stop stocking (the red button), or Cancel.
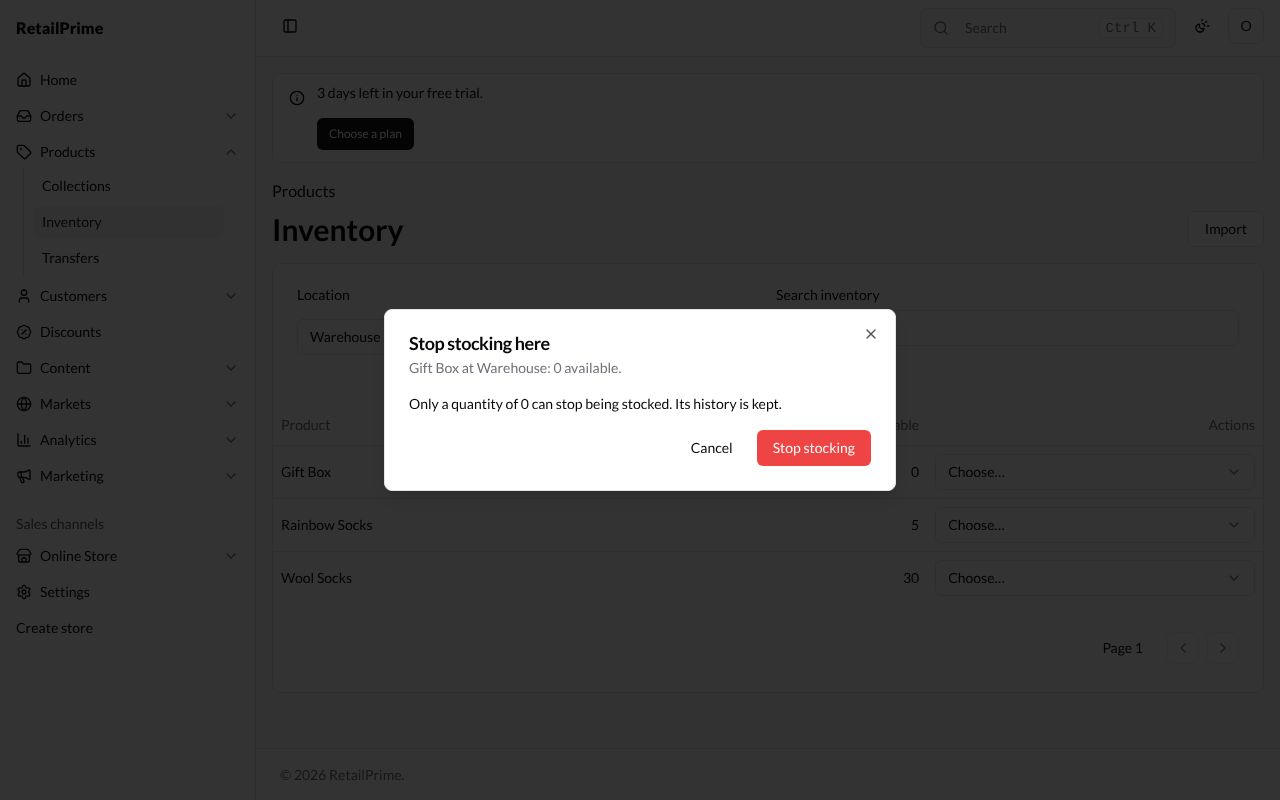
The Gift Box leaves the Warehouse list. It is still stocked at the Shop location.
Import quantities from a CSV file
After a stock count, you can set many quantities at once from a spreadsheet.
Make the file
The easiest start is an export: on Products, press Export, choose Inventory and press Export (see The products list). You get inventory_export.csv, with one row per variant and location. Change the Available numbers and save it as CSV.
The file needs the Handle, Location and Available columns. Here is a file for the Ankle Socks (in three sizes) and the Bamboo Socks:
Handle,Title,Option1 Name,Option1 Value,SKU,Location,Available
ankle-socks,Ankle Socks,Size,S,AS-S,Shop location,20
ankle-socks,Ankle Socks,Size,M,AS-M,Shop location,15
ankle-socks,Ankle Socks,Size,L,AS-L,Shop location,10
bamboo-socks,Bamboo Socks,,,BS-1,Shop location,8
bamboo-socks,Bamboo Socks,,,BS-1,Back room,4| Column | What goes in it |
|---|---|
| Handle | The product’s handle (the end of its web address, shown under URL handle on the product) |
| Title | The product’s title, to help you read the file |
| Option1 Name, Option1 Value | Which variant, such as Size and S. Leave them empty for a product without options. (Option2 and Option3 columns work the same way) |
| SKU | The variant’s SKU. It is used when the option values don’t find the variant |
| Location | The location’s name, as in Settings → Locations (capital letters don’t matter) |
| Available | The new quantity: a whole number from 0. Leave it empty to keep the quantity as it is |
Each row sets the quantity; it doesn’t add to it. Changes are recorded in each variant’s history as a correction.
Upload it
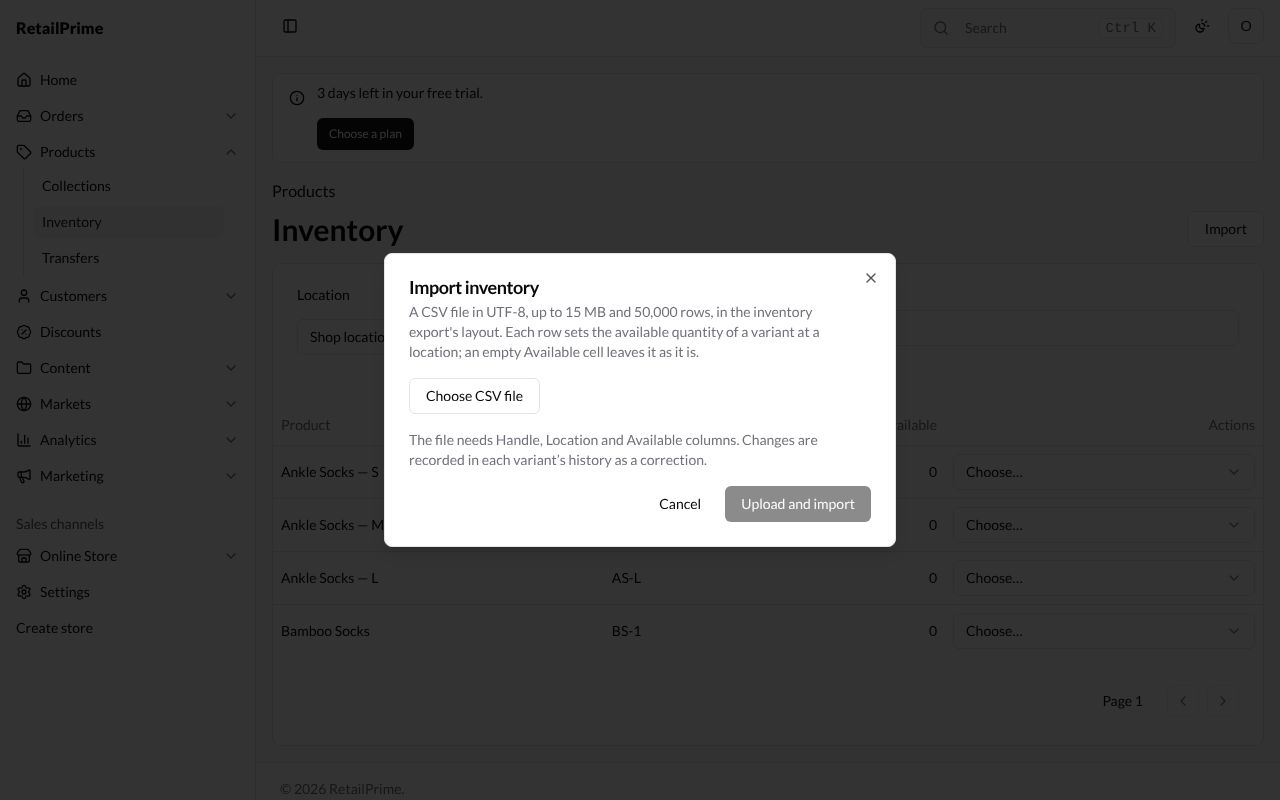
- On Inventory, press Import at the top right.
- A box opens: Import inventory. Press Choose CSV file and pick your file. Its name and size appear under the button.
- Press Upload and import.
Read the result
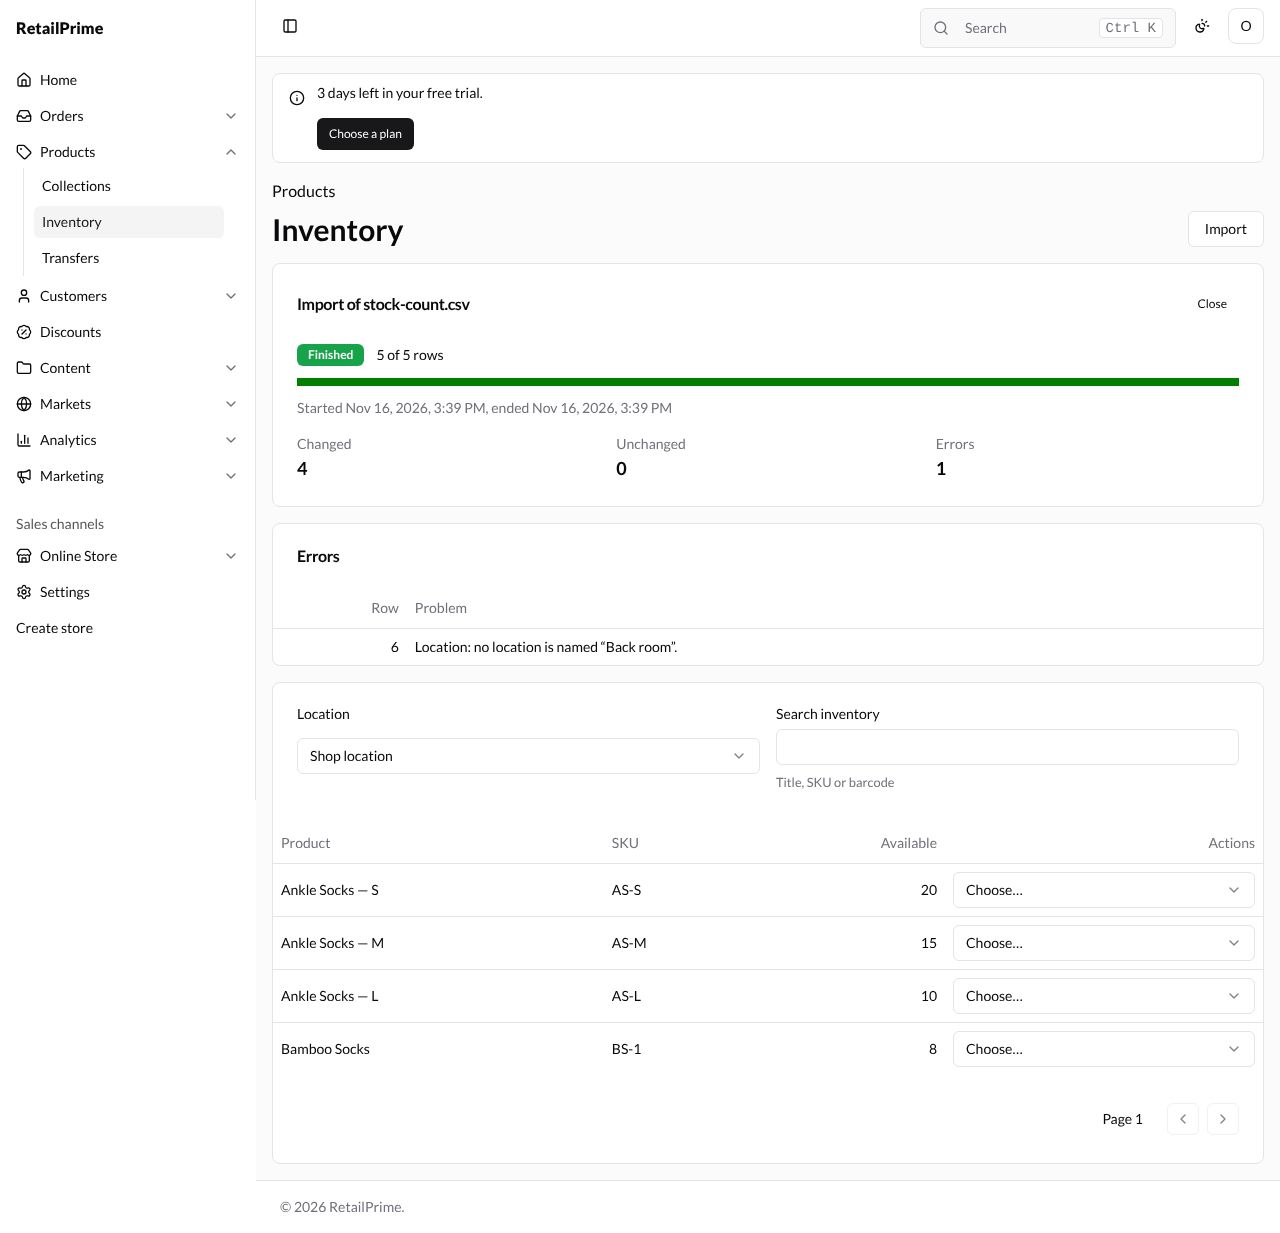
A report appears at the top of the Inventory page, named after your file (Import of stock-count.csv). It shows:
| Part | What it shows |
|---|---|
| The status and 5 of 5 rows | Finished when it is done, and how many rows it has read |
| Changed | Rows that changed a quantity |
| Unchanged | Rows whose quantity was already right, or whose Available was empty |
| Errors | Rows that couldn’t be used. The table gives the Row of the file and the Problem |
Here row 6 names a location the store doesn’t have, so it says Location: no location is named “Back room”. The other four rows changed the quantities you can see in the list below the report.
Fix any error rows in your file and import it again. Press Close to hide the report.
What’s next
Send stock from one location to another: Transfers.