Notifications and webhooks
See the emails your store sends, email new orders to your staff, and create, test, edit and delete webhooks.
In Settings, press Notifications. The page says The emails your store sends. Templates use your store’s name.
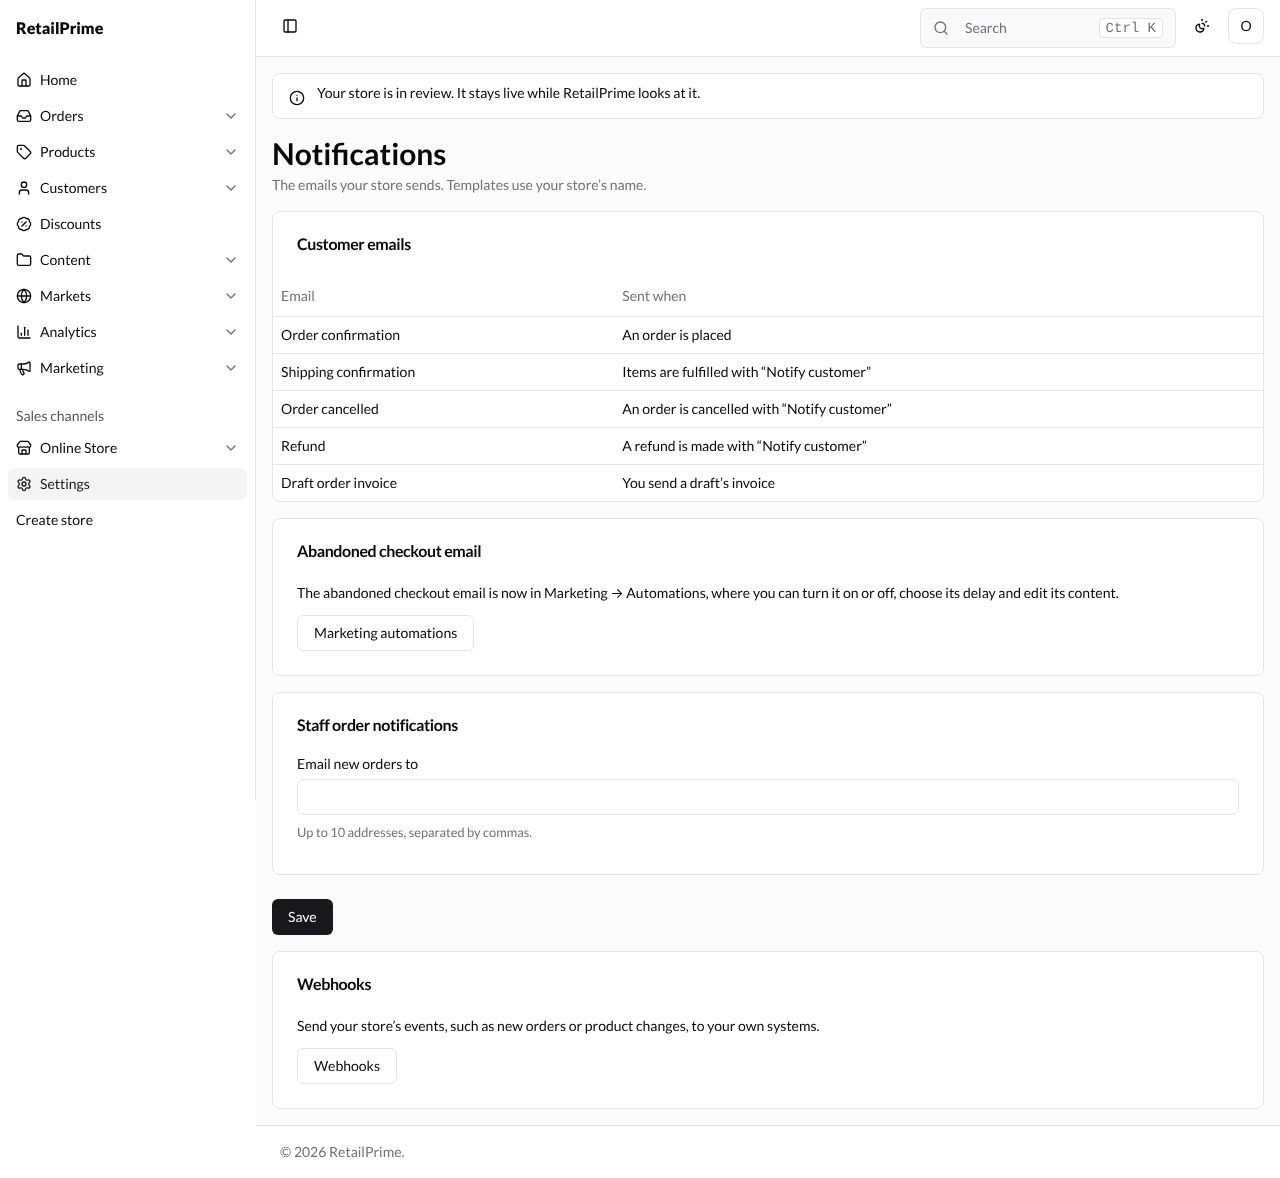
Customer emails
The Customer emails table lists the emails your buyers get, and when:
| Sent when | |
|---|---|
| Order confirmation | An order is placed |
| Shipping confirmation | Items are fulfilled with “Notify customer” |
| Order cancelled | An order is cancelled with “Notify customer” |
| Refund | A refund is made with “Notify customer” |
| Draft order invoice | You send a draft’s invoice |
This page has no way to edit these emails.
Abandoned checkout email says The abandoned checkout email is now in Marketing → Automations, where you can turn it on or off, choose its delay and edit its content. Press Marketing automations to go there (Automations in part 4).
Staff order notifications
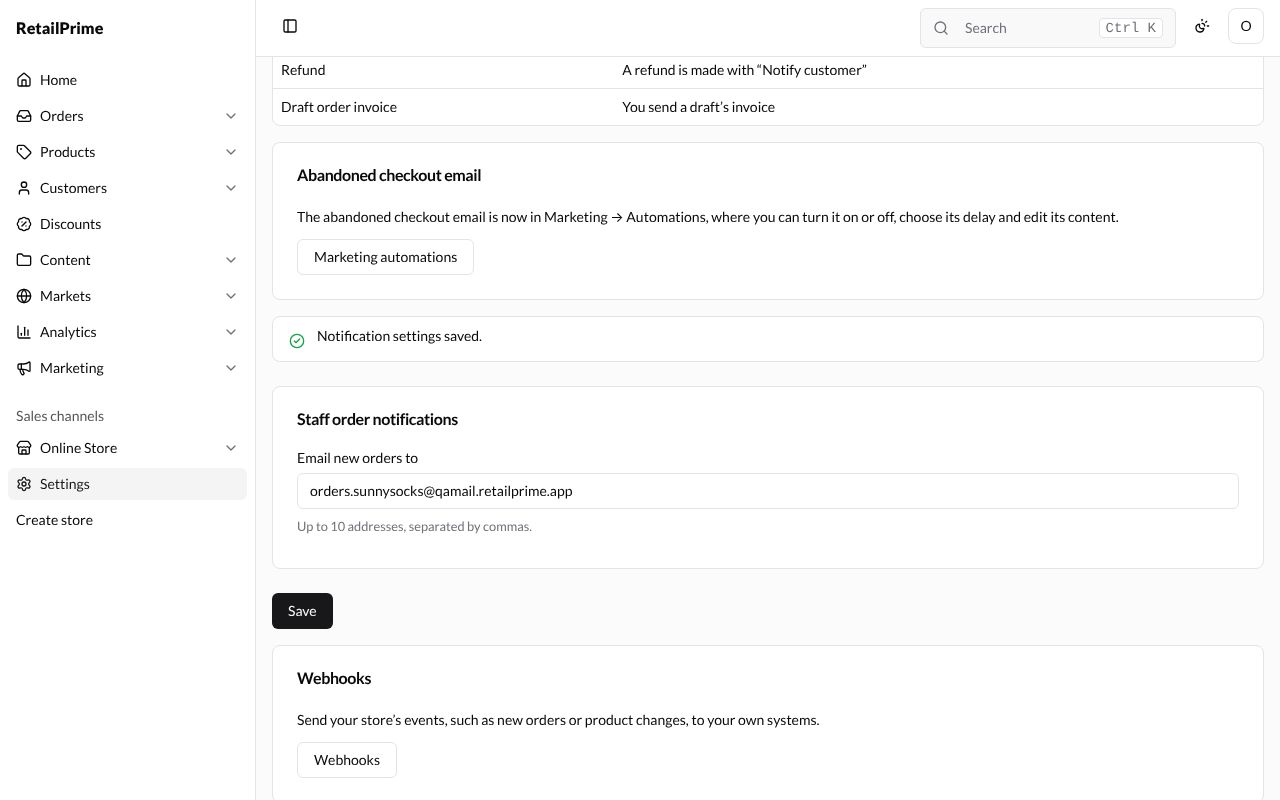
To get an email for every new order:
- In Email new orders to, type one address, or several separated by commas (Up to 10 addresses, separated by commas.). Example:
orders.sunnysocks@qamail.retailprime.app. - Press Save. The page says Notification settings saved.
When a buyer places an order, that address gets an email: A new order was placed at Sunny Socks: #1001, 1 item, PKR 1,500.00. with a View order button that opens the order in the Admin.

Webhooks
A webhook sends your store’s events (such as a new order) to your own system as they happen. You need a web address on your own domain that can receive them. On the Notifications page, press Webhooks.
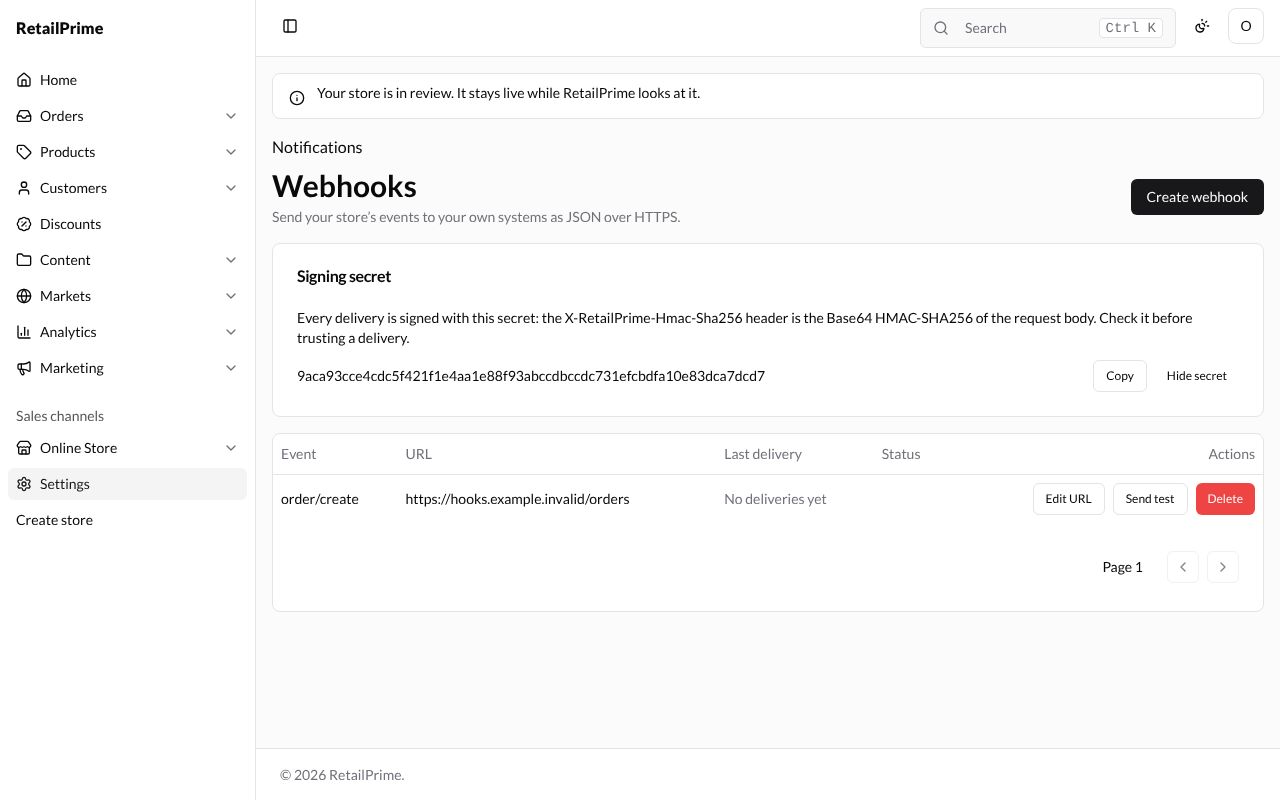
The page says Send your store’s events to your own systems as JSON over HTTPS. The Signing secret card explains: Every delivery is signed with this secret: the X-RetailPrime-Hmac-Sha256 header is the Base64 HMAC-SHA256 of the request body. Check it before trusting a delivery. Before your first webhook, Show secret says The secret is made with your first webhook.
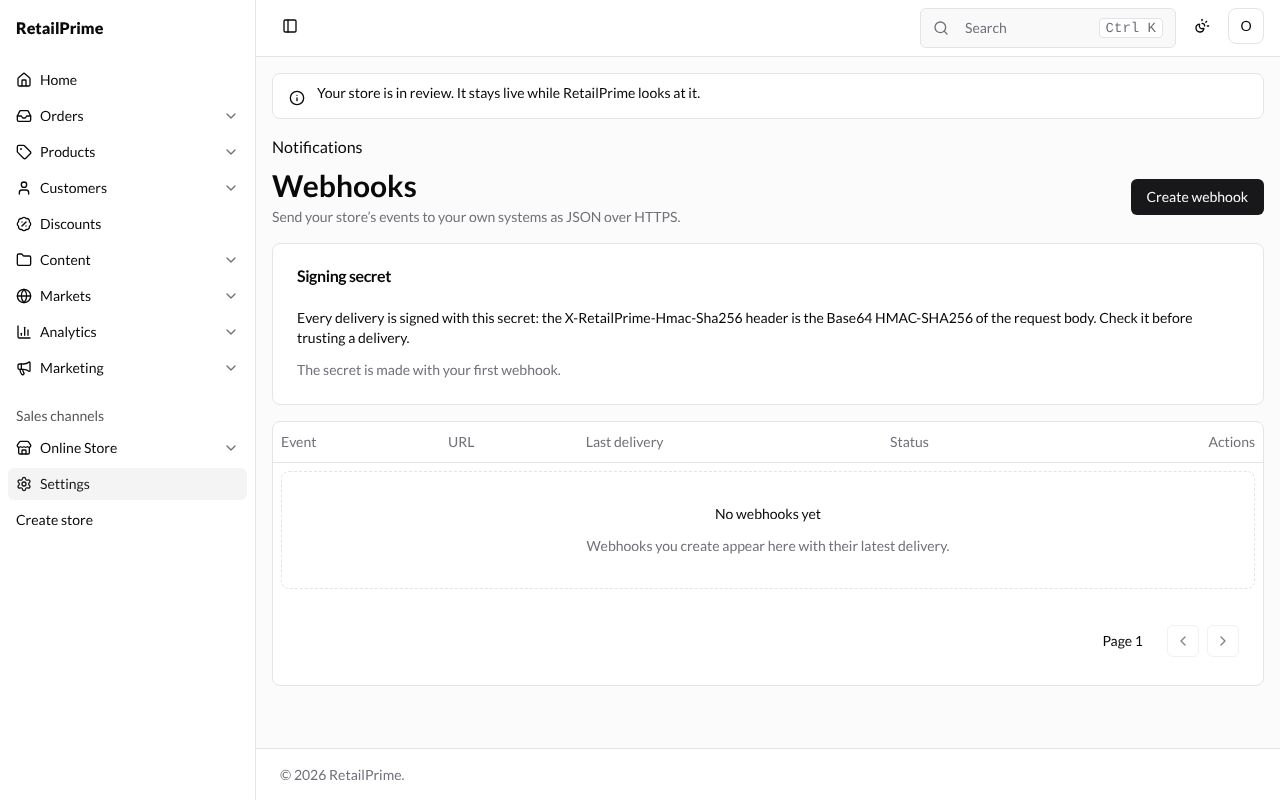
Create a webhook
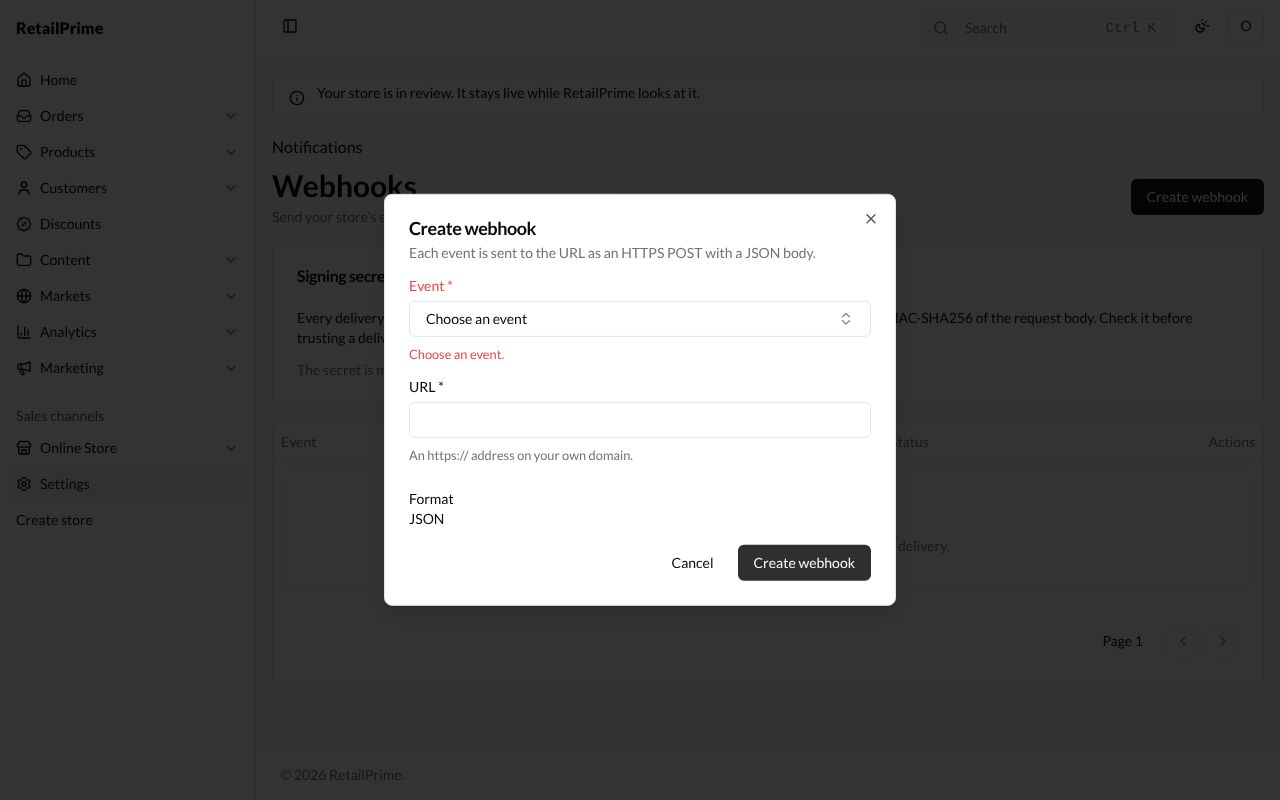
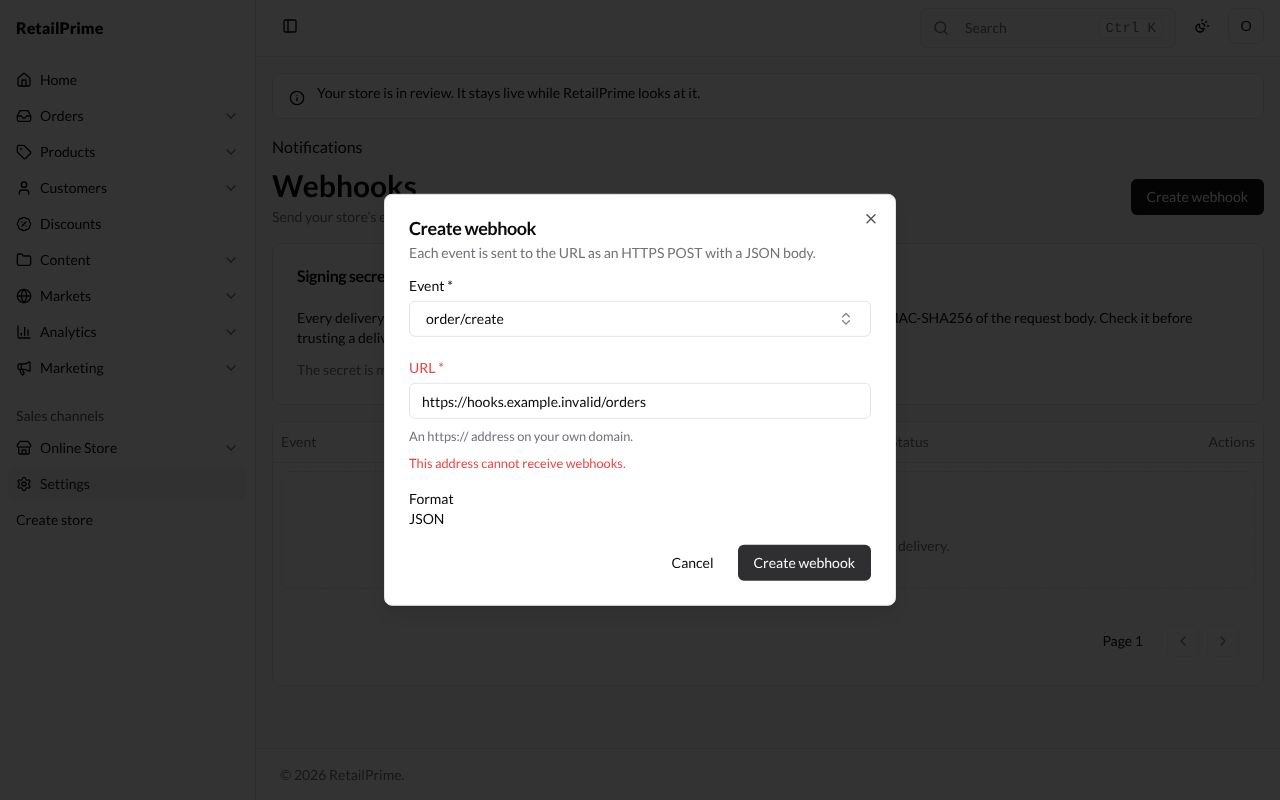
- Press Create webhook. The window says Each event is sent to the URL as an HTTPS POST with a JSON body.
- Fill it in:
| Box | What to choose | Example |
|---|---|---|
| Event (required) | The event to send. The list is grouped: Products and inventory, Orders, Customers, Companies, Discounts and markets, Content and files, Online store and Store. Without one: Choose an event. | order/create (a new order) |
| URL (required) | An https:// address on your own domain. | https://hooks.yourcompany.com/orders |
| Format | Always JSON |
- Press Create webhook. The page says Webhook for order/create created. and lists it.
RetailPrime checks the address first. An address that isn’t a public web address on the internet is refused: This address cannot receive webhooks.
The webhook list and the signing secret
Each webhook shows its Event, URL, Last delivery (No deliveries yet at first) and Status, with Edit URL, Send test and Delete. Press Show secret to see the store’s signing secret, Copy to copy it, and Hide secret to hide it again. The same secret signs every webhook of your store.
Send a test
-
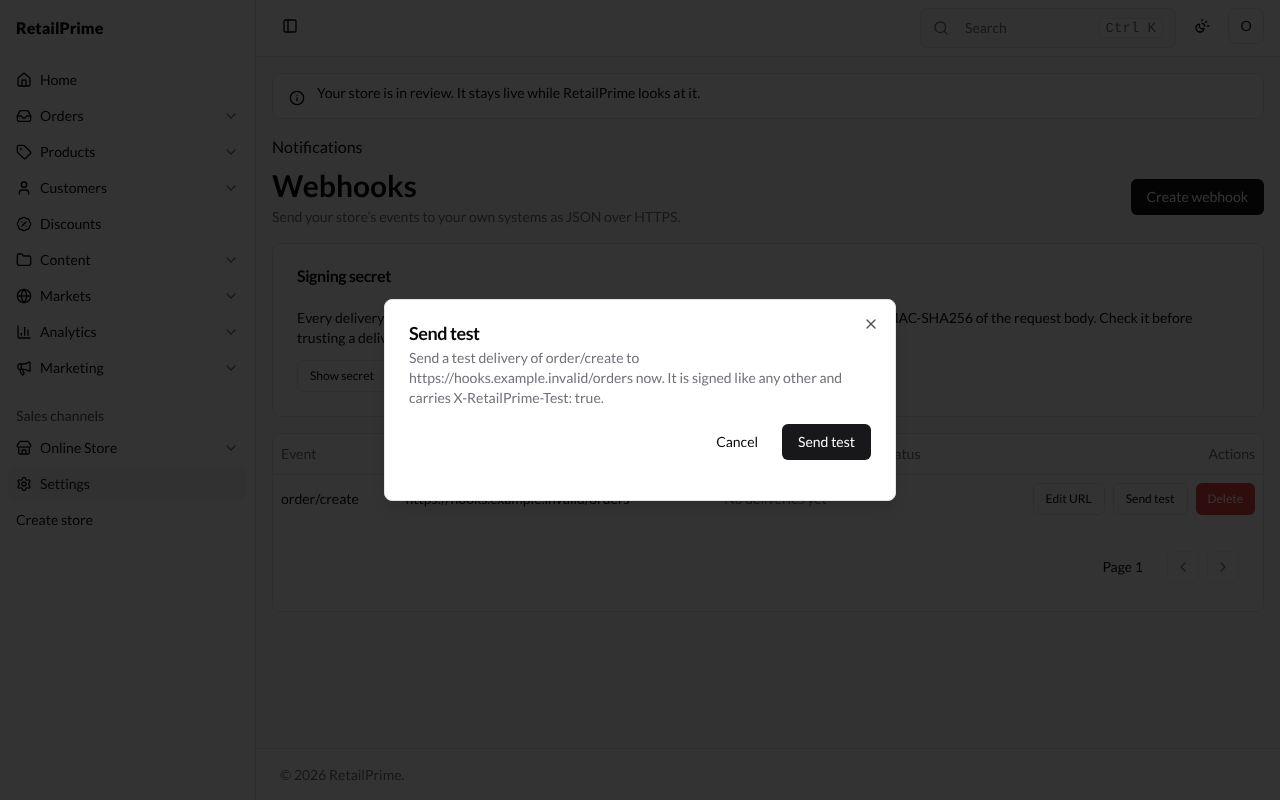
Press Send test on the webhook’s row.
-
The window says Send a test delivery of order/create to the URL now. It is signed like any other and carries X-RetailPrime-Test: true.
-
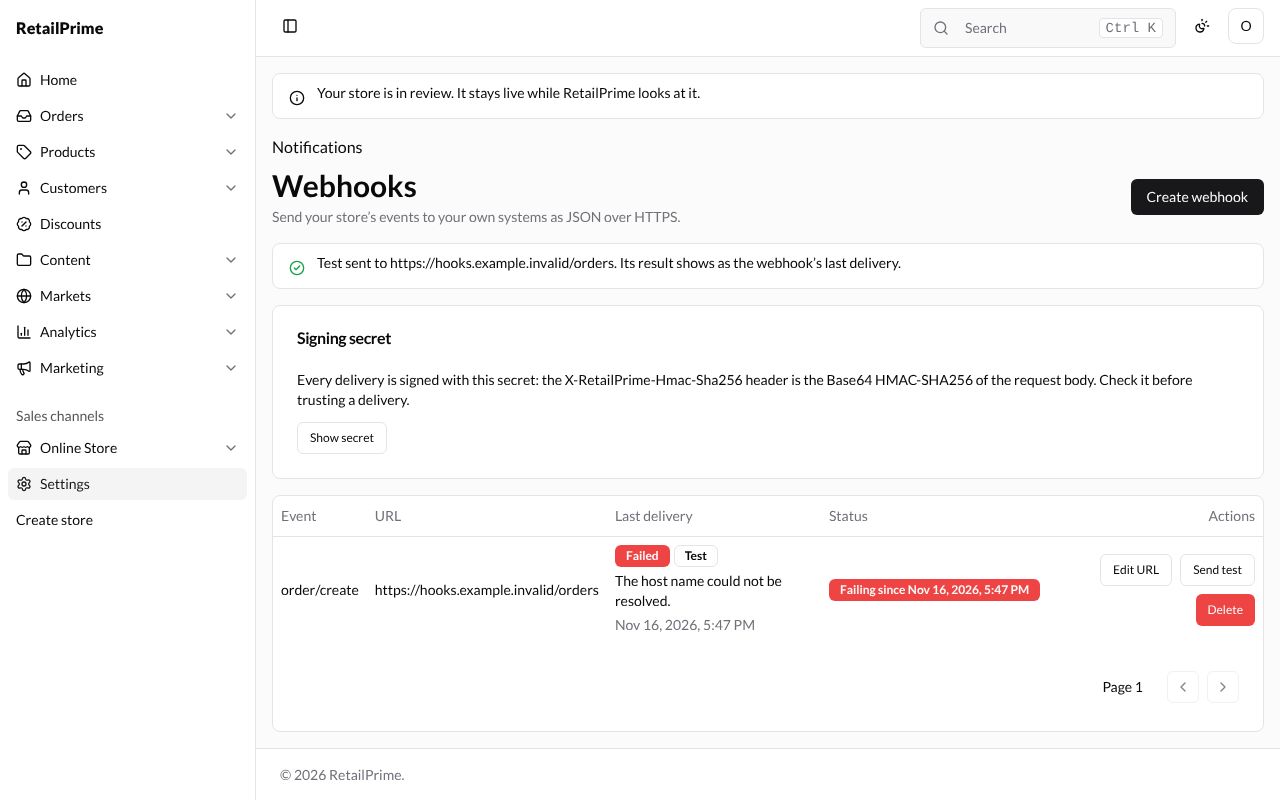
Press Send test. The page says Test sent to the URL . Its result shows as the webhook’s last delivery. A moment later, Last delivery shows the result with a Test badge: Delivered, or Failed with the reason. Here the address can’t be reached, so it says Failed, The host name could not be resolved., and the Status is Failing since the time.
Edit a webhook’s URL
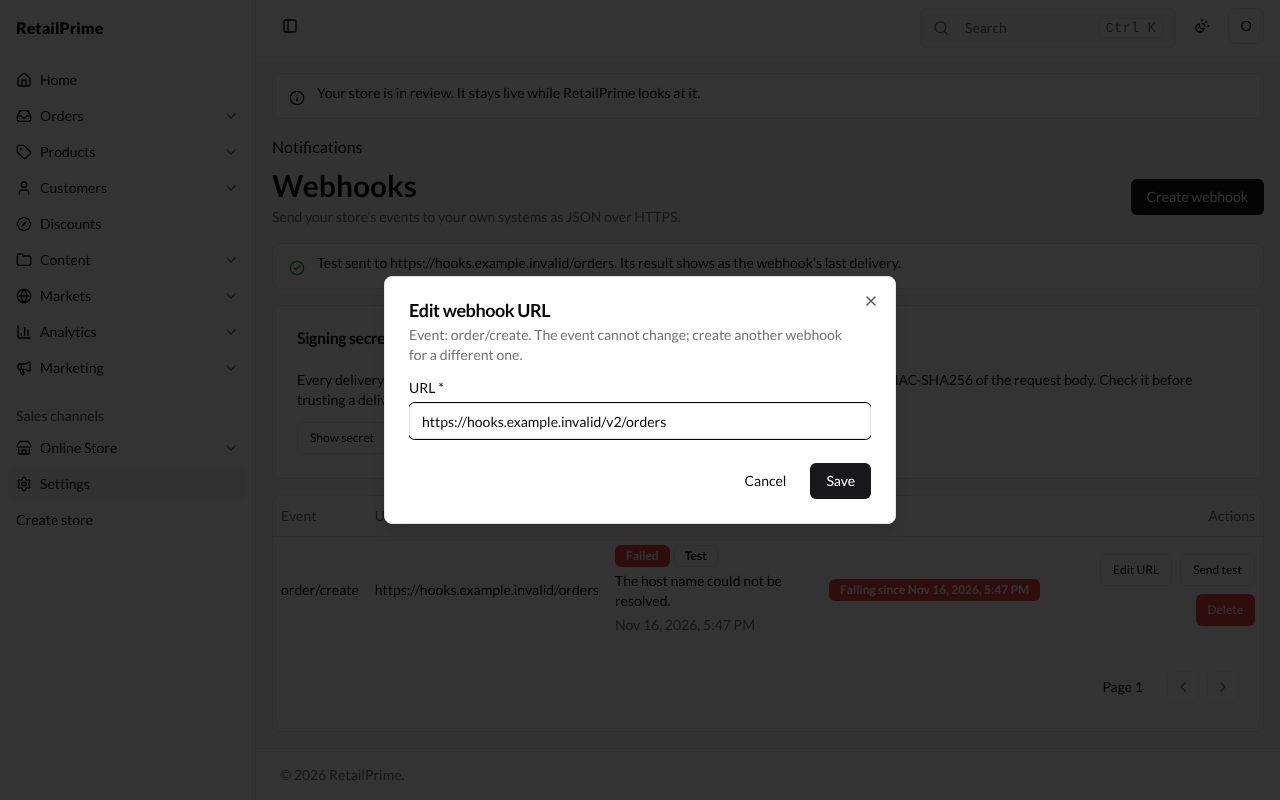
Press Edit URL. The window says Event: order/create. The event cannot change; create another webhook for a different one. Change the URL and press Save (the new address is checked as when creating).
Delete a webhook
-
Press Delete on its row.
-
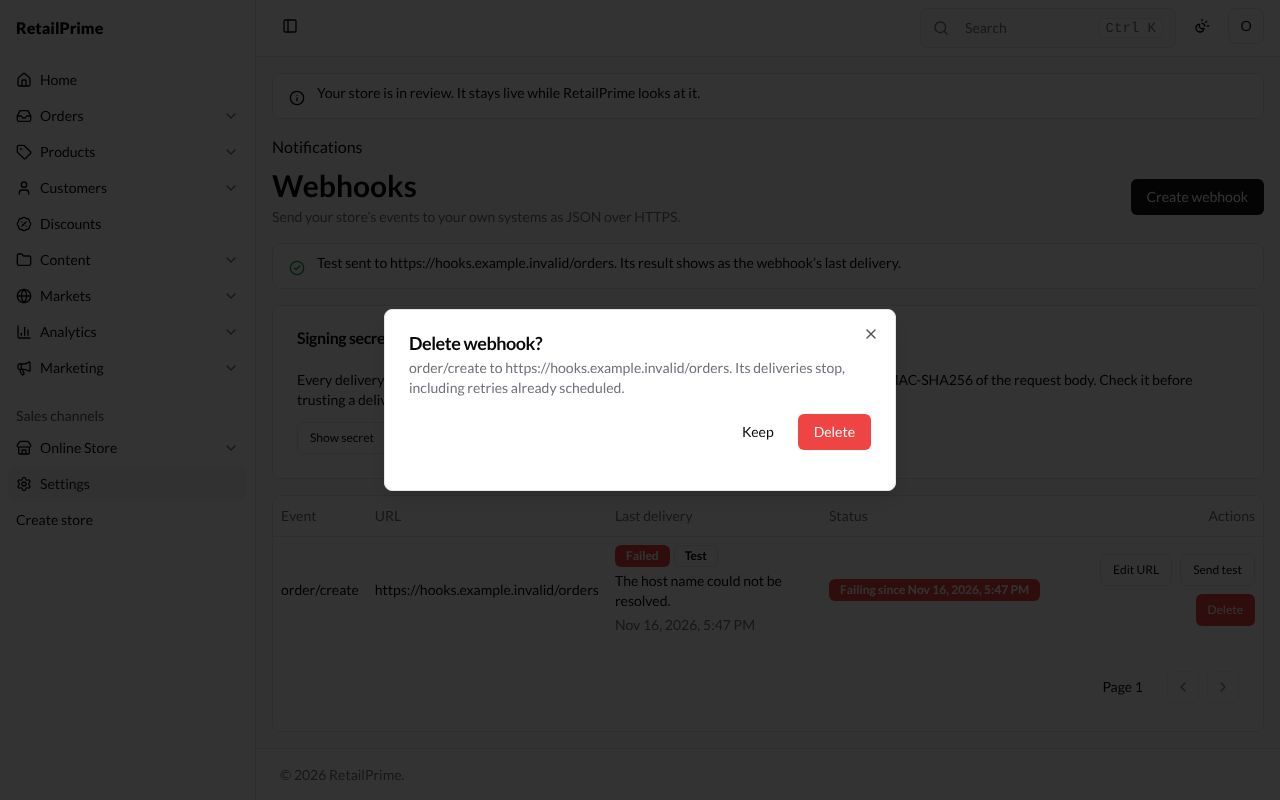
A window asks Delete webhook?: the event and URL, then Its deliveries stop, including retries already scheduled.
-
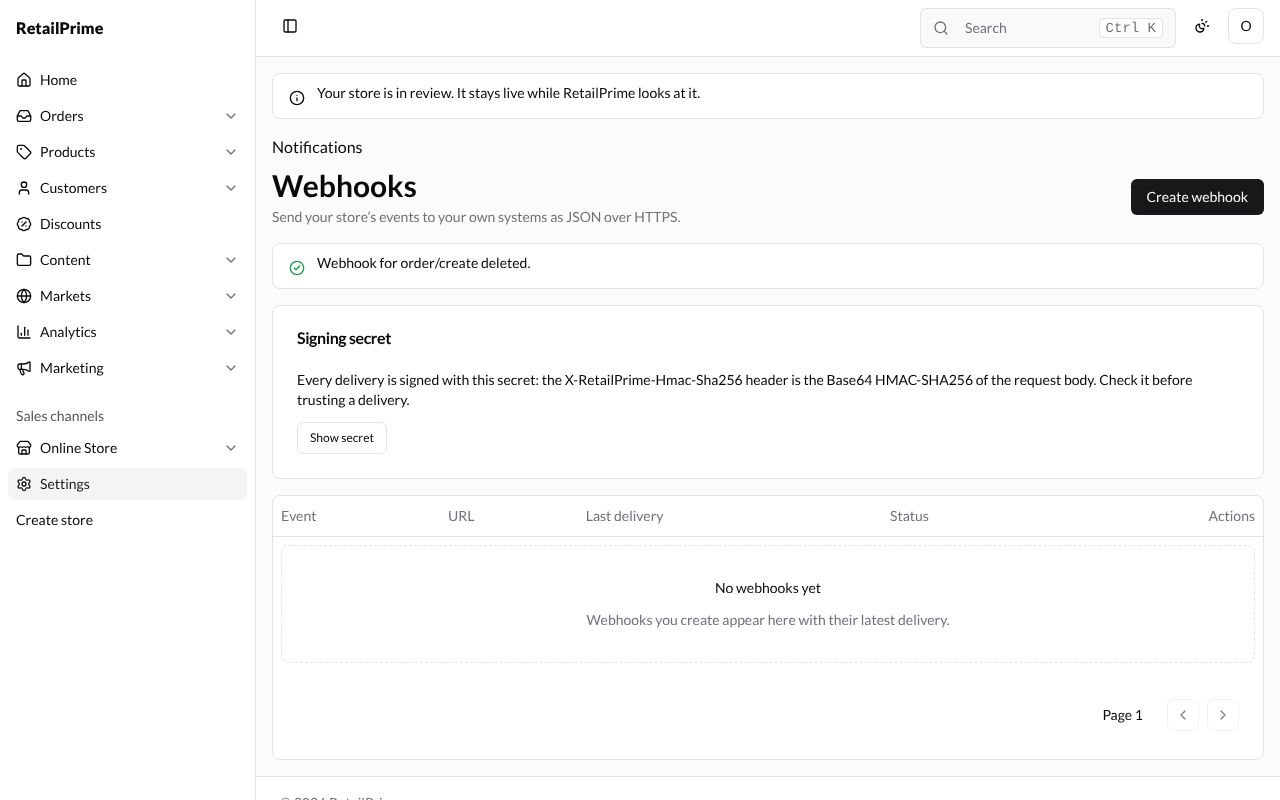
Press Delete. The page says Webhook for order/create deleted.
What’s next
Policies: write the refund, privacy, shipping and other policies buyers read.